Gatsby - PWA A2HS 기능 구현하기
8 min read

A2HS 기능 구현하기
A2HS는 Add to home screen 을 지칭하는 것으로 홈 화면에 웹 앱을 추가하는 것입니다. 그래서 기존에는 사용자가 브라우저에 직접 주소를 입력해서 들어와야 했다면 A2HS를 적용하면 간편하게 홈에 추가된 앱을 통해 사용자의 접근을 빠르게 유도할 수 있습니다.
A2HS를 적용하기 위해서는 몇 가지 조건이 필요합니다. HTTPS가 적용되어야 하고 manifest 파일과 아이콘, 서비스 워커가 등록되어 있어야 합니다. 해당 글에서는 manifest와 서비스 워커를 적용하는 과정을 알아보겠습니다.
gatsby-plugin-manifest
gatsby에서는 manifest 구성을 도와주는 gatsby-plugin-manifest 플러그인을 통해 A2HS 기능을 손쉽게 구현할 수 있습니다.
yarn add gatsby-plugin-manifest을 통해 플러그인을 설치하고 플러그인에 대한 옵션을 지정하면 됩니다.
gatsby-config.js
    {
      resolve: `gatsby-plugin-manifest`,
      options: {
        name: `jgjgill-blog`,
        short_name: `jgjgill-blog`,
        start_url: `/`,
        background_color: `#f0abfc`,
        theme_color: `#c471f5`,
        display: `standalone`,
        icon: 'src/images/icon.png',
        cache_busting_mode: 'none',
        icon_options: {
          // For all the options available,
          // please see the section "Additional Resources" below.
          purpose: `any maskable`,
        },
      },
    },
관련된 속성들에 대한 설명은 해당 문서에서 자세히 설명되어 있어서 참고하시면 좋습니다.
gatsby-plugin-offline
서비스 워커와 관련해서는 gatsby-plugin-offline을 활용할 수 있습니다. 해당 플러그인을 사용하면 manifest 파일이 서비스 워커에 포함될 수 있습니다.
yarn add gatsby-plugin-offline 설치 후 플러그인을 추가하시면 되는데,
여기서 주의할 점은 gatsby-plugin-offline 플러그인은 gatsby-plugin-manifest 보다 뒤에 위치해야 합니다.
    {
      resolve: `gatsby-plugin-manifest`,
      ...options 설정 내용,
    },
    // gatsby-plugin-offline: manifest.webmanifest 캐시 생성을 위해 manifest 플러그인 이후에 위치
    {
      resolve: 'gatsby-plugin-offline',
    },
다음 두 플러그인이 잘 적용되었는지 확인하려면 head 태그 내부에 manifest 링크 태그가 추가되었는지 확인해보시고 개발자 도구에서 애플리케이션 탭에서 manifest 관련 부분을 살펴보시면 됩니다.
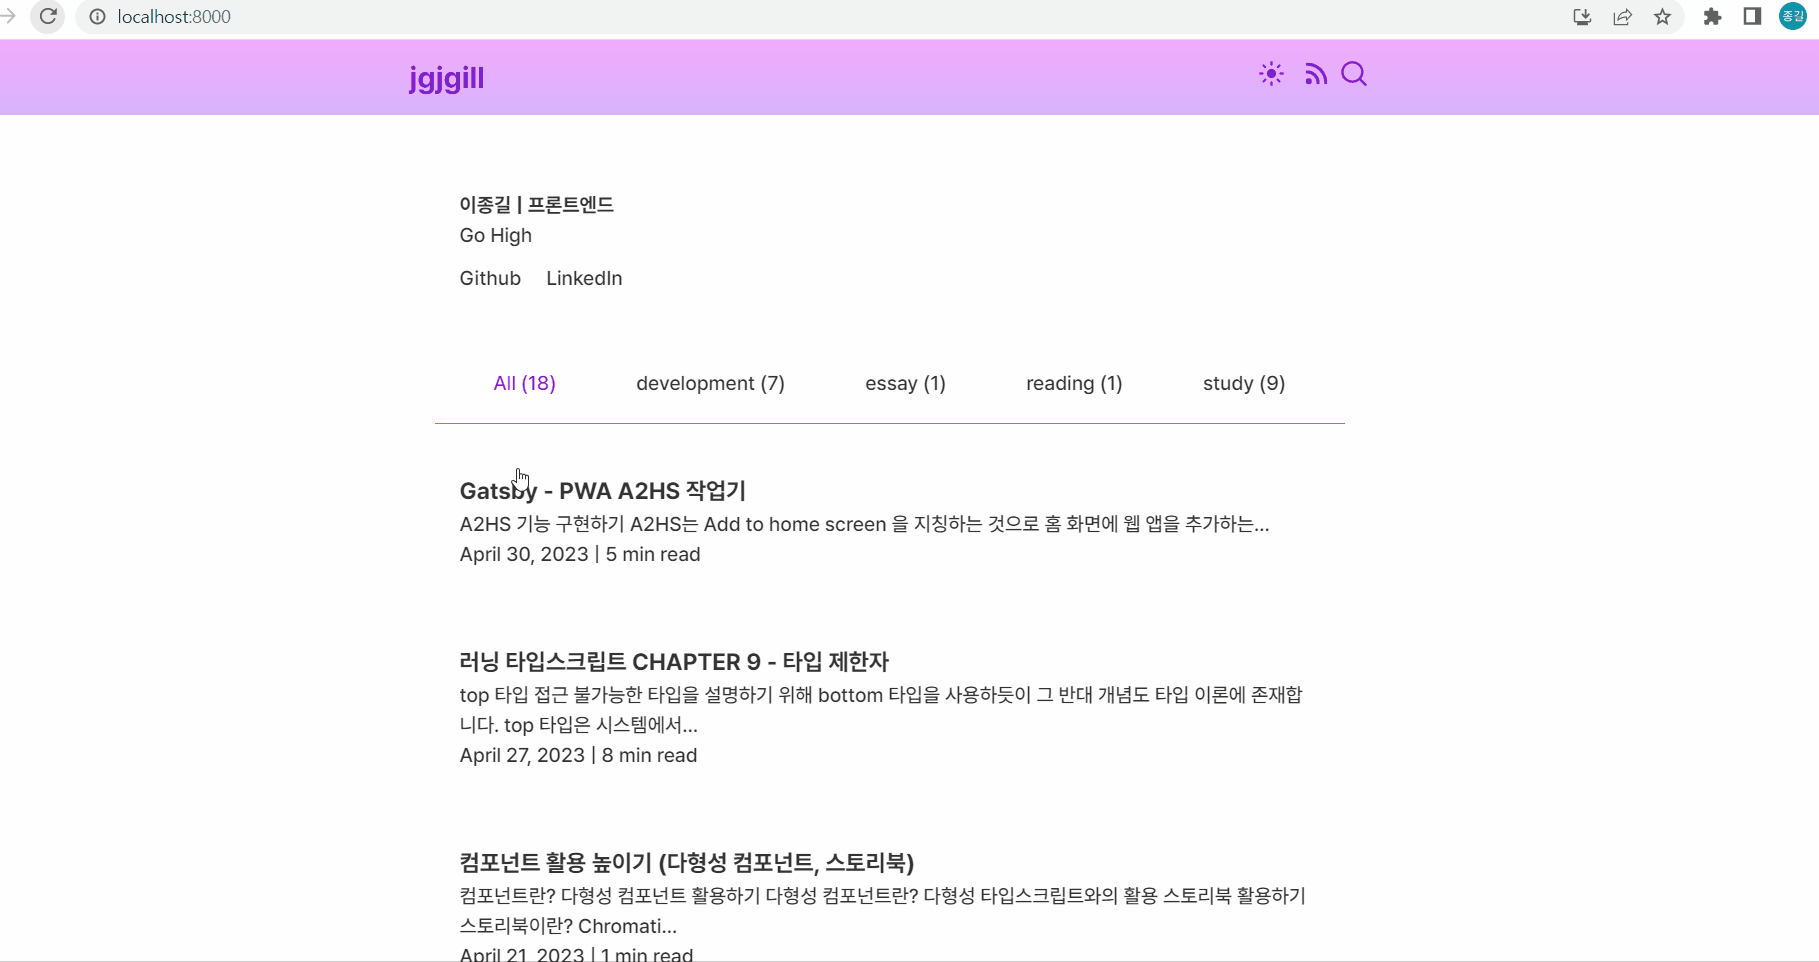
적용된 화면
잘 적용되었다면 다음과 같이 A2HS 기능을 사용하실 수 있습니다.😉
데스크탑

모바일

A2HS 기능 리팩토링하기
앞선 과정을 통해 PWA에서 A2HS를 구현할 수 있었습니다. 하지만 해당 기능만으로는 사용자의 접근성을 높이기는 어려울 것 같습니다. 대다수의 사용자는 PWA에서의 웹 앱 기능에 대해 알지 못할 것입니다. 그래서 A2HS 기능을 사용자에게 알려주는 이벤트를 추가하고자 합니다.
BeforeInstallPromptEvent
BeforeInstallPromptEvent은 사용자에게 웹 앱을 설치하도록 유도할 때 사용되는 이벤트입니다.
앞서 살펴본 A2HS 설치 조건이 충족되었을 때 BeforeInstallPromptEvent가 실행됩니다.
BeforeInstallPromptEvent은 아직 타입이 정의되어 있지 않아서 MDN에 정의되어 있는 문서를 확인하며 타입 인터페이스를 구성해주셔야 합니다.
export interface BeforeInstallPromptEvent extends Event {
  readonly platforms: string[]
  readonly userChoice: Promise<{
    outcome: 'accepted' | 'dismissed'
    platform: string
  }>
  prompt(): Promise<void>
}
구성된 속성과 메서드에 대해 간략하게 살펴보겠습니다.
메서드에서는 prompt를 통해 사용자에게 설치창을 보여줍니다.
userChoice은 prompt로 보여진 설치창에서 사용자의 선택에 따라 outcome을 통해 accepted 혹은 dismissed를 반환합니다.
platforms은 이벤트가 발생되는 플랫폼을 반환합니다. ex) ['web', 'android', 'windows']
이러한 흐름을 바탕으로 코드를 구현하면 다음과 같습니다.
useA2HS.ts
import { useEffect, useState } from 'react'
import { BeforeInstallPromptEvent } from 'types/custom'

export default function useA2HS() {
  const [deferredPrompt, setDeferredPrompt] = useState<BeforeInstallPromptEvent | null>(
    null,
  )

  const install = () => {
    if (deferredPrompt === null) return

    deferredPrompt.prompt()
    deferredPrompt.userChoice.then(() => setDeferredPrompt(null))
  }

  const clearPrompt = () => {
    setDeferredPrompt(null)
  }

  useEffect(() => {
    const handler = (e: BeforeInstallPromptEvent) => {
      e.preventDefault()
      setDeferredPrompt(e)
    }

    window.addEventListener('beforeinstallprompt', handler as any)
    return () => {
      window.removeEventListener('beforeinstallprompt', handler as any)
    }
  }, [])

  return { deferredPrompt, install, clearPrompt }
}
A2HS.tsx
import useA2HS from 'hooks/useA2HS'
import React from 'react'
import { Flex, Text } from './@shared'
const A2HS = () => {
const { deferredPrompt, install, clearPrompt } = useA2HS()
if (!deferredPrompt) return null
return (
<div>
<button type="button" onClick={install}>
추가
</button>
<button type="button" onClick={clearPrompt}>
취소
</button>
</div>
)
}
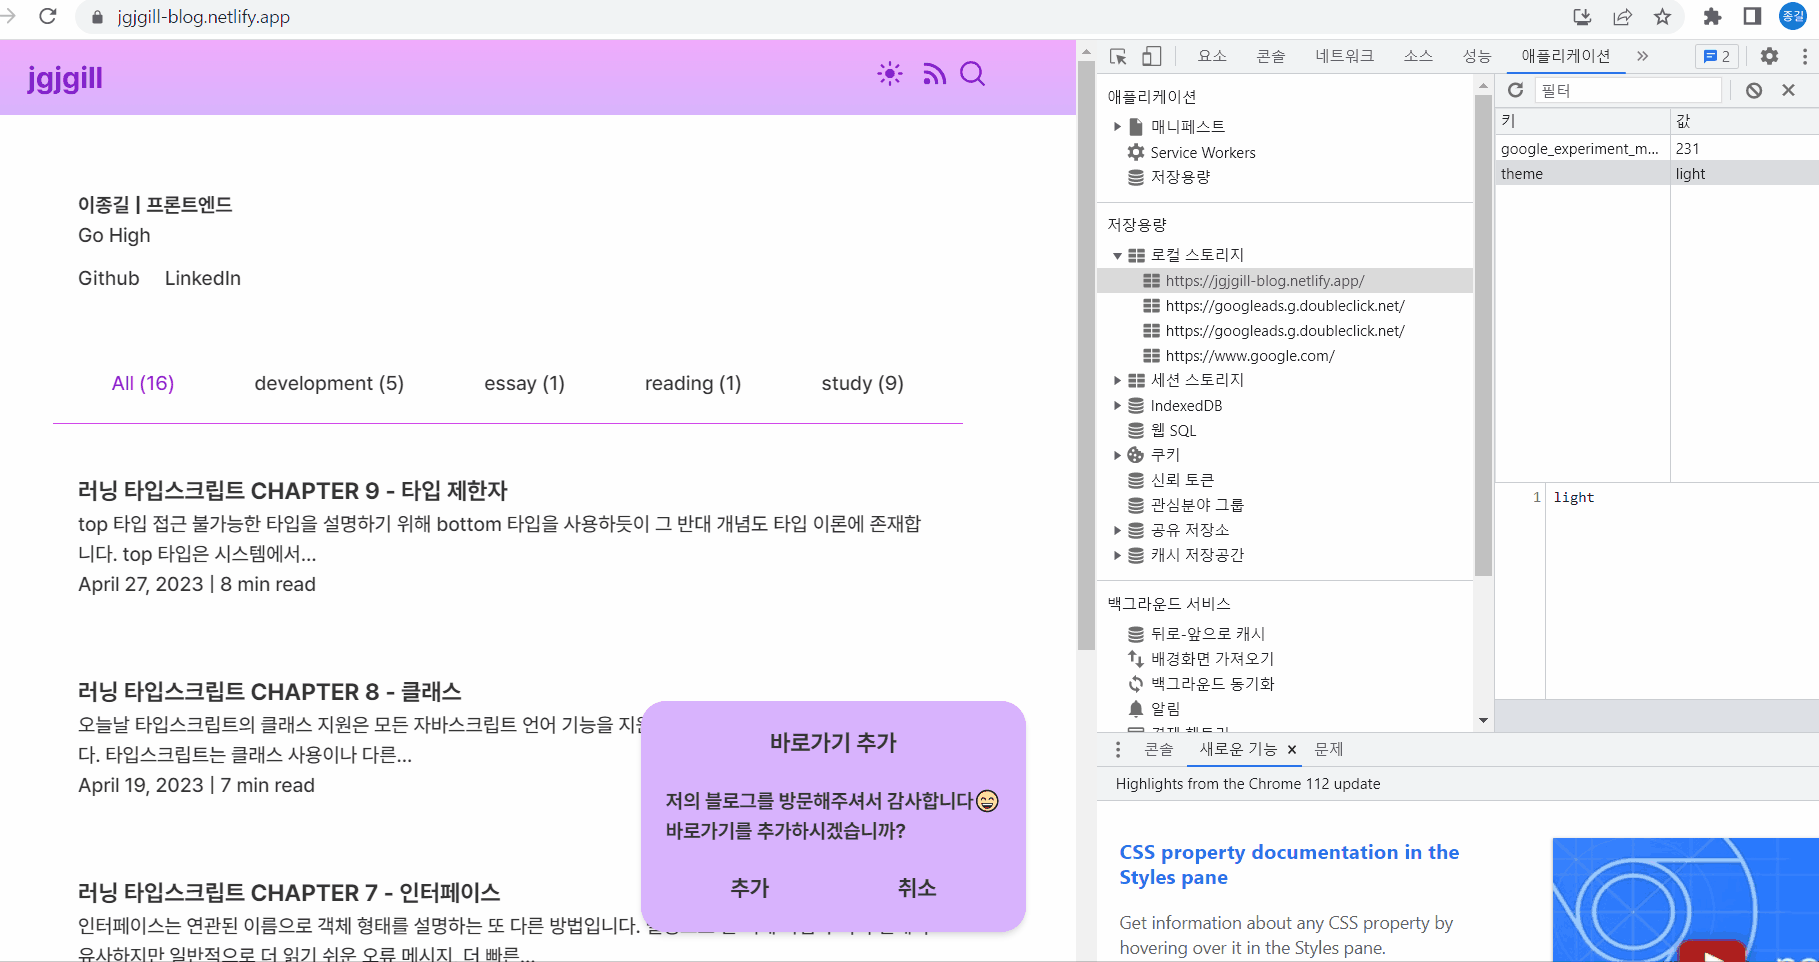
export default A2HS컴포넌트와 관련해서 스타일이 추가된 화면은 다음과 같습니다.
취소 이벤트 발생 후 일정 시간 안보이게 하기
설치창에서 사용자가 취소를 눌렀을 때 일정 시간 안보이게 하는 것이 필요합니다.
localstorage와 new Date를 활용하여 적절히 시간을 계산하면 되겠네요.
해당 부분은 클래스를 활용하여 코드의 관심사를 분리하면 좋을 것 같습니다.
a2hs.ts
export class a2hs {
  // localStorage 키값
  private static HIDE_INSTALL_A2HS = 'hide_install_a2hs'

  // localStorage 값 가져오기
  static get hideInstallA2HS() {
    return localStorage.getItem(this.HIDE_INSTALL_A2HS)
  }

  // localStorage에 저장된 값이 현재 시간보다 큰 경우 (숨겨야 하는 경우) true 반환
  static get isValidateHideInstallA2HS() {
    return Number(a2hs.hideInstallA2HS) > Date.now()
  }

  // 일주일 후 기준으로 localStorage 값 설정
  static setHideInstallA2HS() {
    const currentAfterWeek = String(new Date().setDate(new Date().getDate() + 7))
    localStorage.setItem(this.HIDE_INSTALL_A2HS, currentAfterWeek)
  }

  // localStorage에 설정된 값이 현재 시간보다 작을 때 (보여야 하는 경우) localStorage 값 제거
  static clear() {
    localStorage.removeItem(this.HIDE_INSTALL_A2HS)
  }
}
useA2HS.ts
import { useEffect, useState } from 'react'
import { BeforeInstallPromptEvent } from 'types/custom'
import { a2hs } from 'utils/a2hs'

export default function useA2HS() {
  const [deferredPrompt, setDeferredPrompt] = useState<BeforeInstallPromptEvent | null>(
    null,
  )

  const install = () => {
    if (deferredPrompt === null) return

    deferredPrompt.prompt()
    deferredPrompt.userChoice.then(() => setDeferredPrompt(null))
  }

  const clearPrompt = () => {
    setDeferredPrompt(null)
    a2hs.setHideInstallA2HS()
  }

  useEffect(() => {
    if (a2hs.isValidateHideInstallA2HS) return

    a2hs.clear()
  }, [])

  useEffect(() => {
    if (a2hs.hideInstallA2HS) return

    const handler = (e: BeforeInstallPromptEvent) => {
      e.preventDefault()
      setDeferredPrompt(e)
    }

    window.addEventListener('beforeinstallprompt', handler as any)
    return () => {
      window.removeEventListener('beforeinstallprompt', handler as any)
    }
  }, [])

  return { deferredPrompt, install, clearPrompt }
}
애니메이션 적용하기
A2HS 창에서 아무런 애니메이션이 없으니 밋밋하네요. 관련해서 애니메이션을 추가해주면 좋을 것 같습니다. 해당 과정에서 여러 시행 착오를 겪어서 작업 내용을 기록으로 남겨두겠습니다.😂
useUnmountAnimation
현재 제가 구현하고자 하는 애니메이션은 mount와 unmount의 경우에서 컴포넌트를 이동시키는 것입니다.
이와 관련하여 onTransitionEnd 이벤트를 활용하고자 했습니다.
해당 이벤트는 transition이 종료된 후에 작업을 진행하여 unmount가 되기 전 애니메이션을 진행시킬 수 있습니다.
useUnmountAnimation.ts
import { useEffect, useState } from 'react'

export default function useUnmountAnimation(codition: boolean) {
  const [isCompleted, setIsCompleted] = useState(false)

  const isRenderCodition = isCompleted || codition
  const triggerAnimation = isCompleted && codition

  const handleTransitionEnd = () => {
    if (!codition) setIsCompleted(false)
  }

  useEffect(() => {
    let timeoutId: any

    if (codition) timeoutId = setIsCompleted(true)
    return () => clearTimeout(timeoutId)
  }, [codition])

  return { isRenderCodition, handleTransitionEnd, triggerAnimation }
}
A2HS.tsx
import styled from '@emotion/styled'
import useA2HS from 'hooks/useA2HS'
import useUnmountAnimation from 'hooks/useUnmountAnimation'
import React from 'react'

import { Flex, Text } from './@shared'

const A2HS = () => {
  const { deferredPrompt, install, clearPrompt } = useA2HS()
  const { isRenderCodition, handleTransitionEnd, triggerAnimation } = useUnmountAnimation(
    Boolean(deferredPrompt),
  )

  if (!isRenderCodition) return null

  return (
    <Container
      className="modal"
      onTransitionEnd={handleTransitionEnd}
      $isAnimation={triggerAnimation}
    >
      ...내부 코드
    </Container>
  )
}

export default A2HS

const Container = styled.div<{ $isAnimation: boolean }>`
  transform: ${({ $isAnimation }) => !$isAnimation && 'translateY(500px)'};
  animation: mountAnimation 1s;
  transition: background-color 0.3s, color 0.3s, transform 1s;

  @keyframes mountAnimation {
    0% {
      transform: translateY(500px);
    }
    100% {
      transform: translateY(0);
    }
  }
`
여기서 저는 삽집을 하게 되었는데요.😅 mount에서의 애니메이션도 useUnmountAnimation훅을 활용하여 처리하여 해당 훅의 사용성을 높이고 싶었습니다.
하지만 mount 시에는 애니메이션이 일어나지 않는 경우도 있었습니다.
제가 생각하기에 해당 컴포넌트가 다 그려지기 전에 애니메이션 조건도 true로 변경되는 상황이 발생하는 것으로 보입니다.
그래서 컴포넌트가 다 그려진 뒤에는 애니메이션 조건이 변경되지 않아 애니메이션이 일어나지 않는 것 같았습니다.
이에 setTimeout을 활용하여 setIsCompleted를 true로 변경하는 걸 일부러 늦추는 시도를 했습니다.
useEffect(() => {
  let timeoutId: any

  if (codition) timeoutId = setTimeout(() => setIsCompleted(true), 500)
  return () => clearTimeout(timeoutId)
}, [codition])
이렇게 억지로 mount 시 애니메이션이 발생되는 조건을 늦추면 처음 저의 구상대로 구현은 할 수 있었습니다.
하지만 이 코드는 사용성이 많이 제한되어 보입니다.
억지로 setTimeout으로 500으로 늦추는게 마음에 걸리네요.😂
그래서 결국 mount 시에는 keyframes을 통해 애니메이션을 구현하는 것으로 계획을 변경했습니다.
animation: mountAnimation 1s;

@keyframes mountAnimation {
  0% {
    transform: translateY(500px);
  }
  100% {
    transform: translateY(0);
  }
}
쉽게 할 수 있었던 기능을 여러 삽질 끝에 구현하였지만, 훅의 사용도를 높이고자 고민했던 과정을 기록으로 남겨두겠습니다.😅
마무리
A2HS와 관련된 작업을 하면서 BeforeInstallPromptEvent, onTransitionEnd와 같은 새로운 기능들을 사용해 볼 수 있어서 좋았습니다. 또한, 어떻게 하면 사용자의 접근을 쉽게 유도할 수 있을지를 중점적으로 고민하면서 작업하는 시간이 되었습니다.
이번 글을 통해 A2HS 작업을 하시는 분들에게 도움이 되었으면 합니다.🙇♂️