Gatsby - 카테고리 구현하기
7 min read

카테고리 구현하기
Gatsby에서 카테고리를 구현하는 방법으로 여러 개 존재할 것입니다. 그중에서 저는 Gatsby 홈페이지에서 제안하는 Creating Tags Pages for Blog Posts 방식으로 구현했습니다. 해당 글에서는 태그를 예시로 진행되지만 카테고리에서도 적용이 가능합니다.😄
Frontmatter에 category 추가하기
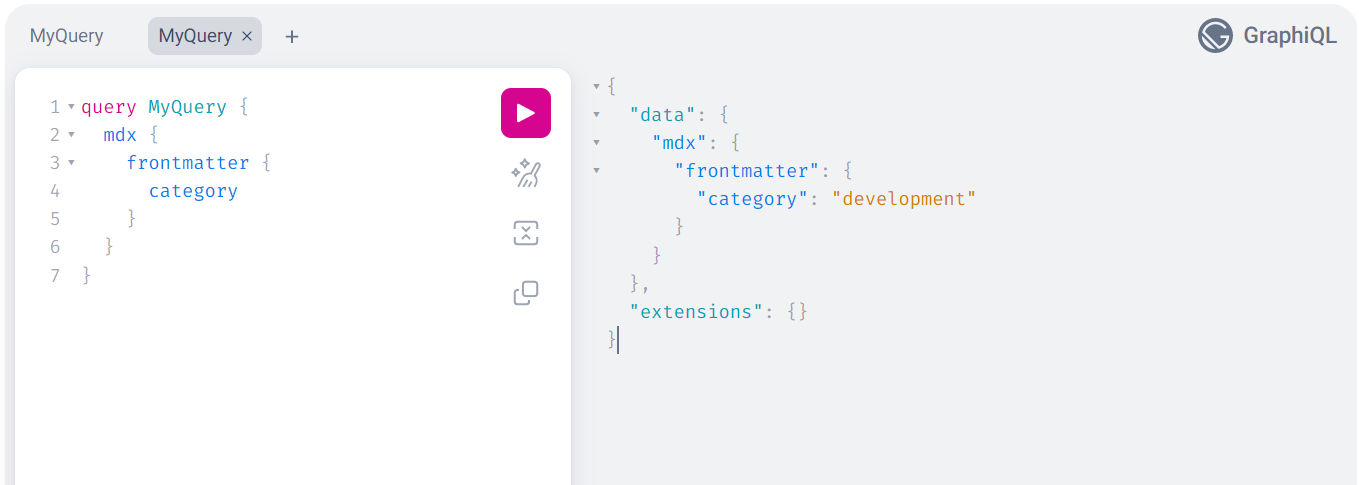
category에 대한 데이터를 받아오기 위해서는 해당하는 컨텐츠 (mdx, md, ...) 파일에서 frontmatter 영역에 카테고리를 추가하면 됩니다.
---
title: 'Gatsby - 카테고리 구현하기'
category: 'development'
---
그러면 Graphql에서 category에 대한 데이터가 생성되는 것을 확인하실 수 있습니다.
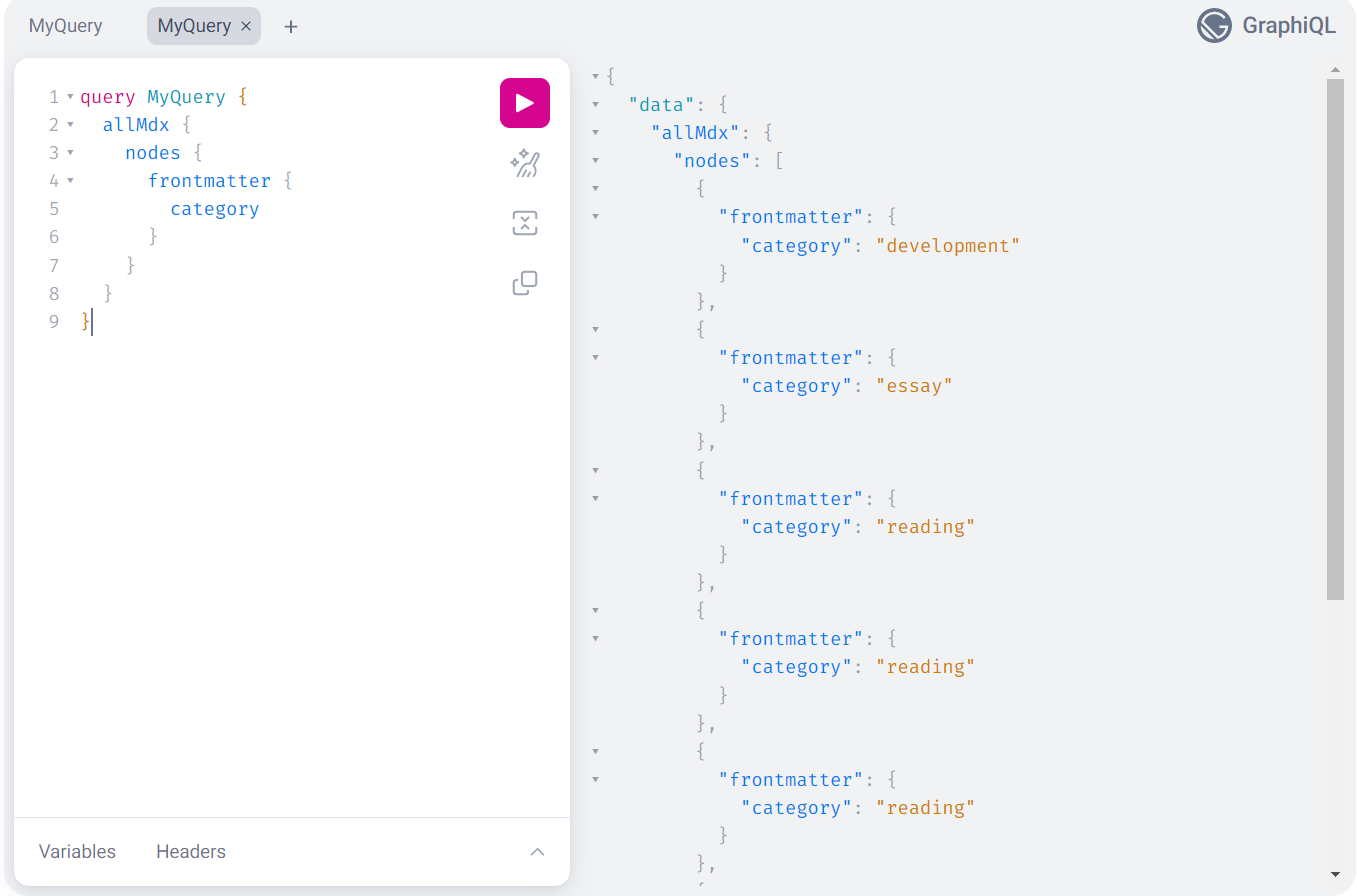
특정 mdx 파일뿐만 아니라 전체 mdx 파일에서도 해당하는 카테고리에 대한 데이터를 받아올 수 있습니다.
카테고리 페이지 Template 만들기
만들어진 category 데이터를 받을 Template 파일이 필요합니다. 이는 다음 단계의 gatsby-node.js의 createPages에서 사용될 것입니다.
src/templates/CategoryTemplate.tsx 경로에 파일을 만들어줍니다. 다른 페이지들을 만들었던 것처럼 코드를 구성해주시면 됩니다.
이렇게 만들어진 Template은 /category/{category-name}와 같은 경로로 활용될 것입니다.
import App from 'App'
import { Author, PostList, Seo } from 'components'
import Flex from 'components/@shared/Flex'
import Category from 'components/Category'
import Layout from 'components/Layout'
import Post from 'components/Post'
import { graphql, HeadFC, PageProps } from 'gatsby'
import useIntersectionObserver from 'hooks/useIntersectionObserver'
import React from 'react'
import { Content } from 'types/content'

interface Props {
  allMdx: {
    nodes: Content[]
  }
  category: {
    totalCount: number
    group: {
      totalCount: number
      fieldValue: string
    }[]
  }
}

const CategoryTemplate = ({
  data,
  pageContext,
}: PageProps<Props, { category: string }>) => {
  const { ref, page } = useIntersectionObserver(data.allMdx.nodes.length)

  return (
    <App>
      <Layout>
        <Flex flexDirection="column" gap={20}>
          <Author />
          <Category selectedCategory={pageContext.category} />

          <PostList
            render={data.allMdx.nodes.slice(0, page).map((node) => (
              <Post key={node.id} node={node} />
            ))}
          />
          <div ref={ref} />
        </Flex>
      </Layout>
    </App>
  )
}

export default CategoryTemplate

export const Head: HeadFC = () => <Seo />

export const query = graphql`
  query ($category: String) {
    site {
      siteMetadata {
        title
      }
    }
    allMdx(
      sort: { frontmatter: { date: DESC } }
      filter: { frontmatter: { category: { in: [$category] } } }
    ) {
      nodes {
        frontmatter {
          date(formatString: "MMMM DD, YYYY")
          title
          slug
          category
        }
        id
        excerpt
      }
    }
  }
`
템플릿 페이지를 렌더링하기 위해 gatsby-node.js 수정하기
Template에 해당하는 페이지를 만들기 위해 gatsby-node.js에서 createPages 작업이 이루어집니다.
전체 코드는 다음과 같습니다.
const path = require('path')

exports.createPages = async ({ actions, graphql, reporter }) => {
  const { createPage } = actions
  const categoryTemplate = path.resolve('src/templates/CategoryTemplate.tsx')
  const result = await graphql(`
    {
      allMdx {
        group(field: { frontmatter: { category: SELECT } }) {
          fieldValue
        }
      }
    }
  `)

  if (result.errors) {
    reporter.panicOnBuild(`Error while running GraphQL query.`)
    return
  }

  const categories = result.data.allMdx.group

  categories.forEach((category) => {
    createPage({
      path: `/category/${category.fieldValue}`,
      component: categoryTemplate,
      context: {
        category: category.fieldValue,
      },
    })
  })
}
앞서 만들었던 Template 파일을 categoryTemplate변수로 받습니다.
result 에서는 category에 대한 값들을 받습니다.
const { createPage } = actions
const categoryTemplate = path.resolve('src/templates/CategoryTemplate.tsx')
const result = await graphql(`
  {
    allMdx {
      group(field: { frontmatter: { category: SELECT } }) {
        fieldValue
      }
    }
  }
`)
이렇게 만들어진 category 데이터는 반복문과 createPage를 통해 페이지를 생성하게 됩니다.
context 에서 사용되는 값은 CategoryPage query에서 지정된 category 게시물 데이터를 가져오는데 사용됩니다.
const categories = result.data.allMdx.group

categories.forEach((category) => {
  createPage({
    path: `/category/${category.fieldValue}`,
    component: categoryTemplate,
    context: {
      category: category.fieldValue,
    },
  })
})
추가로 /category 경로에 대한 페이지가 필요하면 /src/pages/category.js에서 작업하시면 됩니다.
카테고리에 게시판 개수 구현하기
훌륭한 GraphQL
단순히 카테고리만 구분하기에는 아쉬움이 많기 때문에 카테고리 옆에 해당하는 게시판 개수를 보여주면 좋을 것 같습니다.
이 또한, GraphQL를 통해 카테고리별로 해당하는 게시물 개수의 데이터를 받아올 수 있습니다.
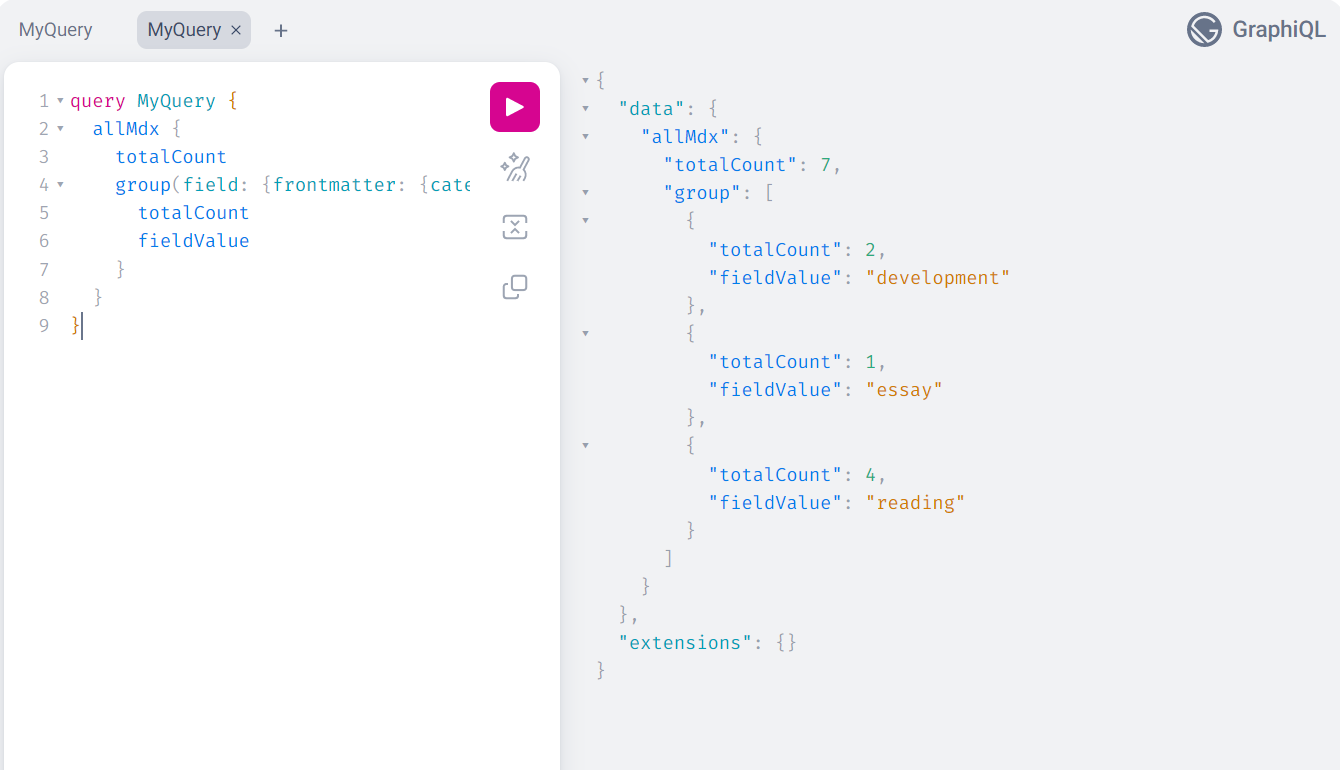
게시물 개수를 받아올 수 있으니 query에서 해당 데이터를 받아오면 됩니다.
하지만 페이지에서 카테고리에 대한 데이터를 받아오는 방식은 비효율적입니다. 페이지를 추가할 때마다 카테고리 데이터를 추가하는 번거로운 과정을 거쳐야 할 것입니다.
그래서 Category 컴포넌트에서 데이터를 불러오는 방식이 더 좋을 것입니다. 카테고리에 대한 관심사를 Category 컴포넌트 내부에서만 관리할 수 있기 때문에 용이합니다.
이와 관련해서 Graphql에서 지원해주는 기능이 있었습니다.
useStaticQuery를 사용하면 페이지 단위가 아닌 Category 컴포넌트에서도 데이터 처리가 가능합니다.
import styled from '@emotion/styled'
import { PATH } from 'constants/path'
import { graphql, Link, useStaticQuery } from 'gatsby'
import React from 'react'

interface Props {
  selectedCategory: string
}

interface CategoryPostCount {
  allMdx: {
    totalCount: number
    group: {
      totalCount: number
      fieldValue: string
    }[]
  }
}

const Category = ({ selectedCategory }: Props) => {
  const data: CategoryPostCount = useStaticQuery(graphql`
    query {
      allMdx {
        totalCount
        group(field: { frontmatter: { category: SELECT } }) {
          totalCount
          fieldValue
        }
      }
    }
  `)

  return (
    <List>
      <Item to={`${PATH.HOME}`} isactive={+(selectedCategory === 'all')}>
        All ({data.allMdx.totalCount})
      </Item>

      {data.allMdx.group.map((category) => (
        <Item
          key={category.fieldValue}
          to={`${PATH.CATEGORY}${category.fieldValue}`}
          isactive={+(selectedCategory === category.fieldValue)}
        >
          {category.fieldValue} ({category.totalCount})
        </Item>
      ))}
    </List>
  )
}

export default Category

const List = styled.nav`
  display: flex;
  justify-content: space-around;
  flex-wrap: wrap;
  gap: 10px;
  width: 100%;
  height: 100%;
  padding: 20px;
  border-bottom: 1px solid ${({ theme }) => theme.colors.secondary.base};
`

const Item = styled(Link)<{ isactive: number }>`
  height: 100%;
  text-align: center;
  transition: 0.3s;
  color: ${({ theme, isactive }) => isactive && theme.colors.secondary.dark};
  &:hover {
    color: ${({ theme }) => theme.colors.secondary.dark};
  }
`
마무리

이렇게 Gastby에서 카테고리를 구현한 과정에 대해 알아봤습니다.
이번 글을 통해 Gatsby에서 카테고리를 구현하려는 분들에게 도움이 되었으면 합니다.🙇♂️